
Follow Me On Social Media!
Skellington Cheese Ball Appetizer Recipe
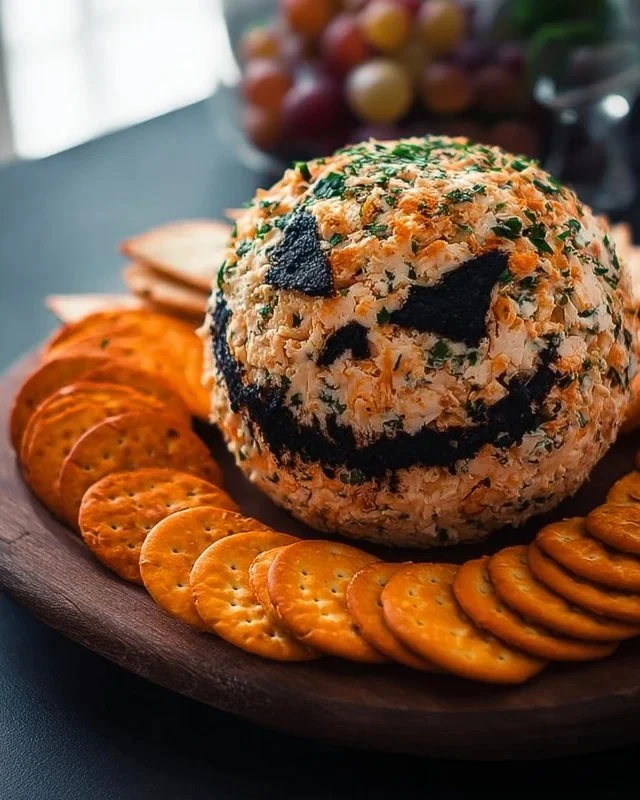
A fun and spooky Skellington cheese ball appetizer everyone can make
This Skellington Cheese Ball Appetizer makes any party feel fun and festive. It looks cute and a little spooky, and it tastes rich and creamy. You only need a few simple ingredients, and you can make it fast. The base is smooth cream cheese and sharp white cheddar. A little garlic, onion, and black pepper add bold flavor. You decorate the face with black olives. That is all. No baking. No special tools. No stress.
This is a perfect pick for Halloween. It also works for movie nights, themed birthdays, fall parties, or any night when you want a snack board that stands out. You can make it ahead and chill it. You can shape it in minutes and add the face at the last minute. It sits proudly at the center of your platter and draws people in. Everyone will talk about it. Then they will taste it and come back for more.
Many cheese balls feel heavy or bland. This one hits a nice balance. The cream cheese makes it smooth. The white cheddar gives it sharp flavor and a little tang. Garlic and onion give it a savory kick without making it hot. Black pepper adds a mild bite that wakes up every bite. When you spread it on a cracker or scoop it up with a crisp veggie stick, you get creamy texture and bright flavor in one bite.
You can set it out with an easy spread: crackers, crostini, pretzels, celery sticks, carrot sticks, cucumber slices, bell pepper strips, or even apple slices for a sweet contrast. You can add meats like salami or prosciutto on the side. You can add nuts and dried fruit if you want more variety. Or keep it simple with one box of crackers and a bowl of carrots. It works either way.
You do not need to be an artist to make the face. The olives do the work. Cut simple shapes for eyes, a nose, and a stitched smile. The white cheese base looks like a little skull. That strong black-on-white contrast pops on the table. If you want to practice, you can place the olives on the plastic wrap first, or try a dry run on a plate. But you do not need to be perfect. A slightly crooked grin makes it look even more playful.
You can scale this recipe up or down easily. Double it for a big party. Halve it for a small group. Keep the spice level simple or add a kick with crushed red pepper if you like heat. Use the tips in this guide to get a smooth shape, a clean look, and the right firmness. You will feel calm as you prep, and proud when you serve.
Let’s walk through why this recipe works, how to make it, and how to serve it so your guests love every bite.
Why Make This Recipe
- It looks great with very little effort. The bold black olive face on white cheese gives a clean, spooky look without any special skills.
- You only need basic ingredients. Cream cheese, white cheddar, simple spices, and olives are easy to find and budget-friendly.
- You can make it ahead. Chill the ball up to a day in advance, then decorate and serve when guests arrive.
- It fits many diets. It is vegetarian and gluten-free when served with gluten-free dippers. It is nut-free as written.
- It is easy to scale. Double it for a crowd or halve it for a cozy night in.
- It travels well. Wrap it tight and keep it cold. Decorate at the party for a fresh look.
- It tastes rich and satisfying. Creamy texture meets sharp cheddar flavor and savory seasoning. Every bite feels balanced.
- It works with many dippers. Crackers, crostini, pretzels, and crisp veggies all taste great with this cheese ball.
- It invites fun. Let kids help with the face. Let friends build their own spooky platter around it.
- It keeps well. Leftovers hold for several days in the fridge, so you can enjoy it after the party too.
How to Make Skellington Cheese Ball Appetizer
You can make this cheese ball in about 10 minutes, plus chill time. The steps are simple: mix, season, shape, chill, decorate, serve. Here is how to get the best results with very little stress.
- Soften the cream cheese. Let it sit at room temperature for 30 to 45 minutes, or until it feels soft when you press it. Soft cream cheese blends faster and smoother. If you are short on time, cut it into cubes to speed up softening.
- Shred the white cheddar if you use a block. Freshly shredded cheese blends better and melts into the mixture with no clumps. If you only have pre-shredded, that also works. Just mix a little longer to combine well.
- Mix in a large bowl. Use a mixing bowl that gives you space to move your spoon or spatula. Add the cream cheese and white cheddar, then sprinkle in the garlic powder, onion powder, and black pepper.
- Stir until smooth. Use a sturdy spatula or wooden spoon and press the mixture against the sides of the bowl. Turn and fold. Do this until the mixture looks creamy and well blended. You should not see streaks of plain cream cheese or clumps of cheese.
- Taste and adjust seasoning. If you like a stronger flavor, add a pinch more garlic powder or pepper. Keep it simple and balanced so the cheddar shines.
- Shape the ball. Place a sheet of plastic wrap on the counter. Scoop the cheese mixture onto the center. Pull up the sides of the wrap and twist to form a tight ball. Use your hands over the plastic to smooth the surface and shape a neat sphere. For a skull vibe, a simple round ball works great as the “head.”
- Chill to set. Refrigerate the wrapped ball for at least 1 hour. Cold cheese holds its shape and gives you a smooth surface for the face.
- Make the face with olives. When you are ready to serve, unwrap the cheese ball and set it on your platter. Cut olives into shapes for eyes, a nose, and a stitched smile. Press them gently into the cheese so they stay in place. Do not push too hard or they will sink in. Keep the face simple. That gives a clean look.
- Build the platter. Arrange crackers, pretzels, and veggies around the ball. Give people space to scoop. Add a small cheese knife or spreader on the side.
- Keep it cool. If you set the platter out for a long time, place a small ice pack under the platter or set it out in shorter windows. Cheese sits out safely for about 2 hours at room temperature. Then return it to the fridge.
These steps turn a few common ingredients into a fun centerpiece. The chilling step matters most. Cold cheese equals clean lines and easy slicing. The rest is simple fun.
Ingredients:
- 2 cups cream cheese (softened)
- 2 cups shredded white cheddar cheese
- 1 teaspoon garlic powder
- 1 teaspoon onion powder
- 1/2 teaspoon black pepper
- Black olives for decoration
Each ingredient plays a clear role:
- Cream cheese gives the base its smooth, creamy body. It makes the ball easy to spread on crackers and veggies.
- White cheddar adds sharp flavor, a touch of tang, and a clean white color that fits the Skellington theme.
- Garlic powder brings savory depth without raw garlic bite. It blends evenly so every bite tastes the same.
- Onion powder adds gentle sweetness and warmth. It rounds out the flavor.
- Black pepper provides a light kick and a hint of spice.
- Black olives give the face its bold features. They also add a briny note that pairs well with cheese.
If you want to adjust the taste, do it with small pinches so you do not mask the cheddar. You can always add more seasoning, but you cannot take it out.
Directions:
- Mix cream cheese and cheddar in a bowl.
- Add garlic powder, onion powder, and pepper. Mix well.
- Shape the mixture into a ball.
- Wrap with plastic and chill for 1 hour.
- Use olives to make eyes, nose, and mouth.
- Place on a platter to serve.
After you follow these steps, check the texture. If the ball feels too soft, chill it longer. If it feels too firm to spread, let it sit at room temperature for 10 to 15 minutes before serving. Aim for a texture that holds its shape, but still spreads easily on a cracker.
For clean lines on the face, pat the olive pieces dry with a paper towel. Dry olives stick better and do not slide on the cheese. If an olive piece shifts, lift it and try again. If you need to fill a small gap, smooth the area with the back of a warm spoon.
How to Serve Skellington Cheese Ball Appetizer
- Choose a flat platter or board. A light or dark surface both work. A dark board makes the white ball pop. A white plate gives a clean, bright look.
- Place the cheese ball off-center. That gives you space to make a ring of dippers around it and makes the face easy to see.
- Offer a mix of crunchy dippers. Use crackers, crostini, and thin pretzel sticks for a crisp bite. Add veggies like celery sticks, carrot sticks, cucumber rounds, and bell pepper strips for fresh crunch. Include gluten-free crackers if you need them.
- Add color. Use orange carrots, green cucumbers, and red peppers to add a festive look around the white cheese ball. It feels lively and fun.
- Include a spreader. A small cheese knife or butter spreader helps guests serve themselves without breaking the face.
- Keep extras nearby. Refill crackers and veggies as people eat. Keep them in small bowls so you can bring out fresh batches fast.
- Set the tone. For Halloween, add a black napkin or a small fake spider on the platter (not on the food) to keep the theme fun. Dim the lights a bit and play light, fun music to match the mood.
Serving ideas:
- Crowd-friendly platter: Cheese ball in the center, ring of crackers, ring of veggies, plus a small bowl of olives or pickles on the side.
- Mini snack board: Cheese ball on a small plate, one box of crackers, and a bowl of carrots. This works for movie night or a family game night.
- Big party spread: Cheese ball, assorted breads and crackers, cured meats, grapes or apple slices, nuts, and a small bowl of honey or fig jam for sweet contrast.
Portion note: This recipe makes enough for about 10 to 12 appetizer servings, depending on what else you serve. If this is your only savory snack, plan for fewer people or double the recipe.
How to Store Skellington Cheese Ball Appetizer
- Short-term: Wrap leftovers tightly in plastic wrap, or place them in an airtight container. Refrigerate for up to 3 to 4 days.
- Make-ahead: Mix and shape the ball up to 24 hours in advance. Wrap and chill. Add the olive face right before serving for the neatest look.
- Serving window: Keep the cheese ball at room temperature for no more than 2 hours. Then return it to the fridge. If you need to serve it longer, set it out in shorter rounds.
- Freezing: Do not freeze this cheese ball. Cream cheese changes texture when frozen and thawed. It can turn grainy and watery.
- Refresh before serving: If the surface looks a little smudged after storing, use a clean knife to smooth it out. Add fresh olives if needed to sharpen the face.
Food safety tips:
- Always keep the cheese ball cold until you serve it. Use a cooler with ice packs if you travel.
- Use clean utensils for serving. Avoid double-dipping.
- Discard any portion that sat out more than 2 hours in a warm room. When in doubt, throw it out.
Tips to Make Skellington Cheese Ball Appetizer
- Soften the cream cheese fully. This makes mixing fast and smooth. Cold cream cheese can leave lumps.
- Shred cheddar fresh if you can. It blends better than pre-shredded, which sometimes has starch that keeps shreds from sticking together.
- Use a sturdy spatula. Press and fold the mixture to remove streaks and create a smooth blend.
- Season, taste, and adjust. Add a small pinch more garlic or pepper if you want. Keep the balance so the cheddar shines.
- Shape with plastic wrap. Place the mixture on plastic wrap, then twist the wrap to tighten the shape. This helps you get a smooth, round ball without sticky hands.
- Chill for at least 1 hour. Cold cheese holds the face better and looks smoother.
- Dry the olives. Pat them with a paper towel so they do not slide. Dry olives stick better to cold cheese.
- Keep the face simple. Large oval eyes, a small triangle nose, and a stitched grin look bold and clean.
- Smooth last-minute dents. Run a spoon under warm water, dry it, then use the back of the spoon to smooth any nicks on the surface.
- Provide a spreader. A small knife helps guests serve without poking the face.
- Serve with lots of dippers. Offer a few crunchy options and a few fresh veggies so everyone finds something they like.
- Make two small balls for large parties. Set them on different tables so people do not crowd at one spot.
- Travel smart. Wrap the ball tight, keep it cold, and decorate when you arrive so the face looks fresh.
- Clean cuts for olives. Use a small paring knife for neat shapes. Work slowly and keep your fingers safe.
- Keep napkins handy. Cheese spreads can be rich and a little messy. Napkins make guests feel at ease.
Variation (if any)
You can keep the taste simple and still have fun with small twists. Here are easy, friendly changes you can try:
- Add heat: Mix in 1 to 2 teaspoons of finely minced pickled jalapeños or a pinch of crushed red pepper for a spicy kick.
- Herbed twist: Stir in 1 to 2 teaspoons of dried parsley or dried chives for a fresh note that still keeps the color pale.
- Smoky note: Add 1/4 to 1/2 teaspoon smoked paprika for gentle warmth and a hint of smoke. Keep the amount small to maintain a white look.
- Bacon boost: Fold in 1/4 cup very finely chopped, crispy bacon for a salty crunch. Pat bacon dry so it does not add grease.
- Ranch vibe: Mix in 1 teaspoon of dry ranch seasoning instead of the garlic and onion powders. Taste and adjust salt if needed.
- Face options: Use strips of roasted seaweed (nori) or thin strips of black bell pepper for the mouth if you do not have olives. You can also use capers for “stitches.”
- Mini balls: Make several small cheese balls and decorate each one with tiny olive faces. This makes serving even easier at big parties.
- Coating ring: For a neat border, roll just the bottom edge of the cheese ball in finely chopped parsley or crushed plain crackers, leaving the top white for the face.
Keep the base recipe the same so the theme stays clear: a white cheese ball with a bold black face.
FAQs
Q: Can I make this cheese ball ahead of time? A: Yes. Mix and shape it up to 24 hours in advance. Wrap it tight and chill. Add the olive face right before serving for the cleanest look.
Q: How long should I soften the cream cheese? A: Let it sit at room temperature for 30 to 45 minutes. If your kitchen is cool, give it up to an hour. Cut it into cubes to speed things up.
Q: Can I use pre-shredded cheddar? A: Yes. Freshly shredded cheddar blends a bit smoother, but pre-shredded works fine. Mix it well so the texture is even.
Q: How many people does this serve? A: It serves about 10 to 12 as an appetizer, depending on your dippers and other snacks on the table.
Q: What are the best dippers? A: Try crackers, crostini, pretzels, celery sticks, carrot sticks, cucumbers, and bell peppers. Offer a mix of crunchy and fresh options.
Q: Can I make it spicy? A: Yes. Add a pinch of crushed red pepper, or mix in finely chopped pickled jalapeños. Start small and taste as you go.
Q: How long can it sit out? A: Keep it at room temperature for no more than 2 hours. Then return it to the fridge. If the room is warm, serve it in shorter rounds.
Q: Can I freeze the cheese ball? A: No. Freezing changes the texture of cream cheese. It can turn grainy after thawing.
Q: What if my cheese ball is too soft? A: Wrap it and chill it longer, at least 30 to 60 minutes more. Cold helps it firm up and hold its shape.
Q: What if my cheese ball is too firm to spread? A: Let it sit at room temperature for 10 to 15 minutes before serving, then try again.
Q: Is this recipe gluten-free? A: The cheese ball itself is gluten-free. Use gluten-free crackers and dippers to keep the whole platter gluten-free.
Q: Can I use another cheese instead of white cheddar? A: You can, but the color and flavor may change. White cheddar gives a clean look and sharp taste. Monterey Jack or mozzarella will be milder.
Q: How do I transport it to a party? A: Keep it wrapped and cold in a cooler with ice packs. Decorate the face at the party so it looks fresh and neat.
Q: Can kids help? A: Yes. Kids can help shape the ball and add the olive face. Just handle the knife work for the olives if they are very young.
Q: How do I double the recipe? A: Double every ingredient. You can make one large ball or two medium ones. Two medium balls are easier to serve and move.
With these steps, tips, and answers, you can make a Skellington Cheese Ball Appetizer that looks fun, tastes great, and fits any festive table. Keep it simple, keep it cold, and enjoy the smiles when you set it down.
Print
Skellington Cheese Ball Appetizer
- Total Time: 70 minutes
- Yield: 10-12 servings 1x
- Diet: Vegetarian, Gluten-free (if served with gluten-free dippers)
Description
A fun and spooky Skellington cheese ball appetizer that is creamy, flavorful, and festive for any gathering.
Ingredients
Scale
- 2 cups cream cheese (softened)
- 2 cups shredded white cheddar cheese
- 1 teaspoon garlic powder
- 1 teaspoon onion powder
- 1/2 teaspoon black pepper
- Black olives for decoration
Instructions
- Soften the cream cheese at room temperature for 30-45 minutes.
- Shred the white cheddar if using a block cheese.
- Mix the cream cheese and white cheddar in a large bowl. Add garlic powder, onion powder, and black pepper, and stir until smooth.
- Shape the mixture into a ball using plastic wrap.
- Chill the ball in the refrigerator for at least 1 hour.
- Unwrap the cheese ball and decorate the face with cut olives for eyes, a nose, and a stitched smile.
- Serve on a platter with dippers such as crackers and veggies.
Notes
Chill the cheese ball to improve its shape and maintain clean lines for the decoration. It can be made a day in advance and dressed right before serving.
- Prep Time: 10 minutes
- Cook Time: 0 minutes
- Category: Appetizer
- Method: No cooking required
- Cuisine: American
Nutrition
- Serving Size: 1 serving
- Calories: 320
- Sugar: 3g
- Sodium: 450mg
- Fat: 22g
- Saturated Fat: 12g
- Unsaturated Fat: 8g
- Trans Fat: 0g
- Carbohydrates: 10g
- Fiber: 1g
- Protein: 10g
- Cholesterol: 40mg
Keywords: cheese ball, Halloween appetizer, party food, festive snacks, vegetarian appetizers