
Follow Me On Social Media!
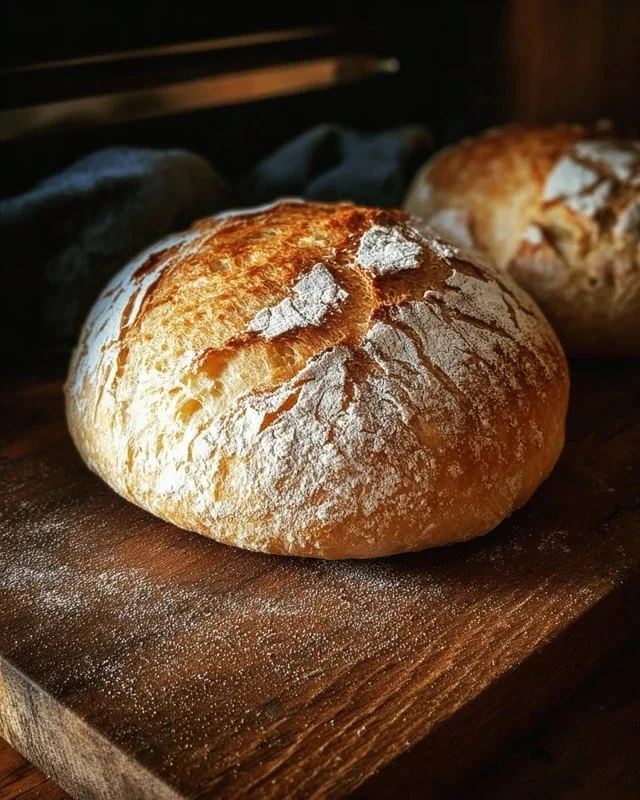
My Mother’s Peasant Bread: Make 2 Loaves Now
My Mother’s Peasant Bread: A Comforting Tradition
Growing up, my fondest memories are tied to the intoxicating aroma of freshly baked bread wafting through our home. One recipe that always took center stage was my mother’s peasant bread. It’s a simple, yet soul-satisfying dish that captures the essence of home and comfort. Whether you’re seeking a warm addition to a family dinner or looking for a nice treat to share at a gathering, this bread is versatile and delightful. This two-loaf recipe not only fills your kitchen with warmth but also the hearts of those you share it with.
Top Reasons to Try This Dish
What makes my mother’s peasant bread so special? It’s all about simplicity and the sense of community it brings. Here are some reasons you’ll fall in love with this recipe:
- Quick and Easy: The straightforward process makes it perfect for beginner bakers or those short on time.
- Budget-Friendly: With just a few basic ingredients, you can create something truly impressive without breaking the bank.
- Kid-Approved: This bread is not only fun to make, but it’s also a hit with kids! They love the squishy dough and thought of creating something from scratch.
- Great for Any Occasion: Whether it’s a cozy weeknight dinner or a special holiday feast, this bread fits right in.
"This bread brought back memories of my childhood. It’s so easy to make, and the taste is just like mom used to make!" – A grateful baker
Preparing My Mother’s Peasant Bread: Make 2 Loaves Now
This recipe is incredibly simple and requires minimal hands-on time. You’ll start by mixing your dry ingredients, then gradually add water to form a dough. After letting it rise, you’ll shape it and give it a second rise before baking. Here’s what to expect in a nutshell:
- Mix dry ingredients
- Add water and form dough
- Let rise
- Shape into loaves
- Second rise
- Bake until golden brown
Gather Your Ingredients
To bake your own mother’s peasant bread, here’s what you’ll need:
- 4 cups (512 g) unbleached all-purpose or bread flour
- 2 teaspoons (10 g) kosher salt
- 2 cups (454 g) lukewarm water
- 2 teaspoons (8 g) sugar
- 2 teaspoons (8 g) instant yeast
- About 2 tablespoons room temperature butter
Feel free to experiment with all-purpose flour or bread flour, based on your preference!
Step-by-Step Directions
- In a large bowl, whisk together the flour, salt, sugar, and instant yeast.
- Gradually add the lukewarm water, mixing until all the flour is absorbed and the dough forms.
- Cover the bowl with a cloth and let the dough rise in a warm spot for at least 1 hour or up to 2 hours in cooler conditions.
- If needed, preheat your oven at any temperature for one minute and then turn it off to create a warm spot to rise.
- Preheat your oven to 425ºF.
- Grease two 1-qt or 1.5-qt oven-safe bowls with about a tablespoon of butter each.
- Use two forks to punch down the dough and scrape it from the bowl’s sides.
- Divide the dough into two equal portions, pulling it apart with the forks.
- Scoop each portion into a prepared bowl.
- Let the dough rise uncovered near the oven or in the warm spot for 20 to 30 minutes until it reaches just below or above the bowl tops.
- Bake for 15 minutes at 425ºF.
- Reduce the temperature to 375ºF and bake for another 15 to 17 minutes.
- Remove the loaves and turn them onto cooling racks. If they are pale or soft, return them to the oven (out of the bowls) and bake for about 5 minutes more.
- Cool the bread for 10 minutes before slicing into it.
Best Way to Serve
Serving my mother’s peasant bread is all about creativity and pairing it with the right accompaniments. Here are some ideas:
- Spread a generous layer of softened butter or cream cheese for a comforting snack.
- Pair it with a warm bowl of soup or a hearty stew for a fulfilling meal.
- Toast slices and top them with your favorite jam or honey for breakfast.
- Serve alongside a fresh salad for a delightful lunch.
Keeping My Mother’s Peasant Bread Fresh Longer
To store your peasant bread and keep it tasting fresh:
- Store leftover loaves in an airtight container or wrap them in plastic wrap to maintain their moisture.
- For longer storage, consider freezing the bread. Slice it beforehand for easy access, then wrap tightly in plastic and aluminum foil before placing it in the freezer.
- Remember to always thaw at room temperature, and if needed, you can revive the texture by lightly toasting or warming it in the oven.
Helpful Hints
Here are some tips to elevate your peasant bread-making experience:
- Use lukewarm water to activate the yeast efficiently. Too hot or cold water can hinder the rising process.
- Let your dough rise in a warm, draft-free space for best results.
- If you’re short on time, consider letting it rise in the fridge overnight for a deeper flavor.
Creative Twists
Feeling adventurous? Here are some variations you can try:
- Herbed Twist: Add dried herbs like rosemary or thyme to the flour for an aromatic touch.
- Cheesy Delight: Mix in shredded cheese like cheddar or gouda for a rich flavor profile.
- Whole Grain Option: Substitute half the all-purpose flour with whole wheat flour for added nutrition and a nutty taste.
Your Questions Answered
-
How long does the dough need to rise?
Typically, the first rise should be at least one hour, but it can go longer if it’s cool. The second rise is about 20 to 30 minutes. -
Can I use active dry yeast instead of instant yeast?
Yes, you can! Just proof the active dry yeast in the lukewarm water with sugar before adding it to the flour mix. -
How do I know if my bread is done baking?
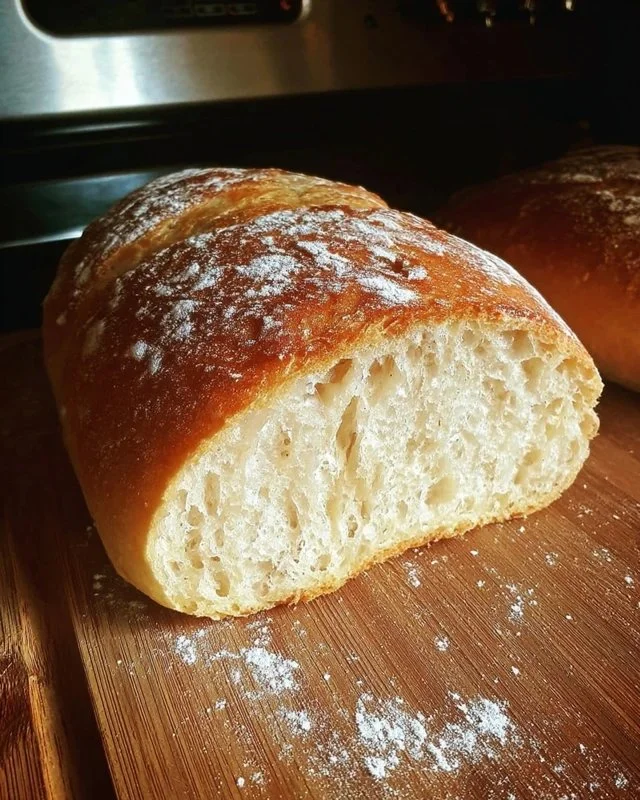
Look for a golden-brown crust and a hollow sound when you tap the bottom. If in doubt, bake it a little longer until it’s firm and golden. -
Can I double the recipe?
Absolutely! This recipe is easily adjustable, just make sure you have enough space for the dough to rise. -
Is it safe to eat the bread after freezing?
Yes, as long as it was stored properly in an airtight container or wrapping. Just make sure to consume it within three months.
Baking my mother’s peasant bread is more than just following a recipe; it’s about reconnecting with cherished memories while creating something delicious. This bread brings warmth and home to any table, and I’m excited for you to experience it!
Print
My Mother’s Peasant Bread
- Total Time: 45 minutes
- Yield: 2 loaves 1x
- Diet: Vegetarian
Description
A simple, soul-satisfying bread that captures the essence of home and comfort.
Ingredients
Scale
- 4 cups (512 g) unbleached all-purpose or bread flour
- 2 teaspoons (10 g) kosher salt
- 2 cups (454 g) lukewarm water
- 2 teaspoons (8 g) sugar
- 2 teaspoons (8 g) instant yeast
- About 2 tablespoons room temperature butter
Instructions
- In a large bowl, whisk together the flour, salt, sugar, and instant yeast.
- Gradually add the lukewarm water, mixing until all the flour is absorbed and the dough forms.
- Cover the bowl with a cloth and let the dough rise in a warm spot for at least 1 hour or up to 2 hours in cooler conditions.
- If needed, preheat your oven at any temperature for one minute and then turn it off to create a warm spot to rise.
- Preheat your oven to 425ºF.
- Grease two 1-qt or 1.5-qt oven-safe bowls with about a tablespoon of butter each.
- Use two forks to punch down the dough and scrape it from the bowl’s sides.
- Divide the dough into two equal portions, pulling it apart with the forks.
- Scoop each portion into a prepared bowl.
- Let the dough rise uncovered near the oven or in a warm spot for 20 to 30 minutes until it reaches just below or above the bowl tops.
- Bake for 15 minutes at 425ºF.
- Reduce the temperature to 375ºF and bake for another 15 to 17 minutes.
- Remove the loaves and turn them onto cooling racks. If they are pale or soft, return them to the oven (out of the bowls) and bake for about 5 minutes more.
- Cool the bread for 10 minutes before slicing into it.
Notes
Store leftover loaves in an airtight container or freeze for longer storage. Thaw at room temperature.
- Prep Time: 15 minutes
- Cook Time: 30 minutes
- Category: Bread
- Method: Baking
- Cuisine: Homestyle
Nutrition
- Serving Size: 1 slice
- Calories: 150
- Sugar: 1g
- Sodium: 200mg
- Fat: 3g
- Saturated Fat: 1g
- Unsaturated Fat: 2g
- Trans Fat: 0g
- Carbohydrates: 28g
- Fiber: 1g
- Protein: 4g
- Cholesterol: 5mg
Keywords: bread, peasant bread, homemade bread, comfort food, baking