
Follow Me On Social Media!

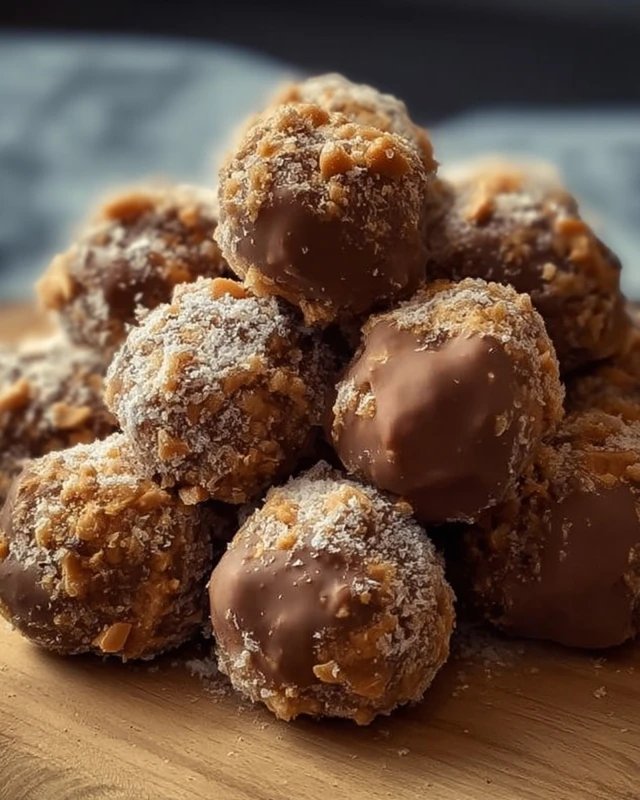
Butterfinger Bliss Balls
Butterfinger Bliss Balls are the perfect indulgent snack to satisfy your sweet tooth! These delightful little treats combine the rich creaminess of peanut butter with crunchy Butterfinger candy bars and a smooth chocolate coating. You can whip them up in no time, making them ideal for parties, after-school snacks, or even just as a well-deserved treat for yourself. Trust me; once you make these, they’ll become a staple in your kitchen!
What Makes This Recipe Special
There are numerous reasons you’ll be drawn to making Butterfinger Bliss Balls. First off, they are a no-bake treat, which means you can avoid the hassle of preheating your oven or dealing with complex baking methods. Secondly, they combine just a handful of ingredients, making it a budget-friendly recipe that won’t break the bank. And let’s not forget the crowd-pleasing factor; both kids and adults love these treats—perfect for parties or family gatherings!
"These Bliss Balls are simply heavenly! They are incredibly quick to make and are a hit with my entire family. Every bite is a taste of nostalgia!" — Happy Taster
Step-by-Step Guide to Cooking It
Making Butterfinger Bliss Balls is straightforward and fun! Here’s the gist of how you’ll prepare these delicious bites before diving into the ingredients. First, you’ll mix the peanut butter, graham crackers, and crushed Butterfinger bars together until they form a cohesive mixture. Next, you’ll shape the mixture into small balls. After a little freeze time to firm them up, you’ll dip each ball in melted chocolate for that irresistible finishing touch. Simple, right?
Gather Your Ingredients
Here’s everything you’ll need to create these delightful Butterfinger Bliss Balls:
- 1 cup creamy peanut butter (smooth works best)
- 1 cup crushed graham crackers (for texture)
- 1 cup Butterfinger candy bars, crushed (the star of the show)
- 1 cup melted chocolate (any variety you prefer; milk, dark, or even white)
Optional: You can use sugar-free peanut butter or vegan chocolate for a healthier or dietary-friendly twist.
Step-by-Step Directions
-
In a mixing bowl, thoroughly combine the creamy peanut butter, crushed graham crackers, and the crushed Butterfinger candy bars until everything is mixed evenly.
-
Use your hands to shape the mixture into small balls. Aim for about 1 inch in diameter for bite-sized treats. Place the balls on a parchment-lined baking sheet.
-
Freeze the balls for around 30 minutes; this will help them firm up, ensuring they hold their shape during dipping.
-
Melt your chocolate in a microwave-safe bowl or using a double-boiler. Dip each frozen ball into the melted chocolate, making sure it’s fully coated.
-
Return the chocolate-covered balls to the parchment-lined baking sheet and refrigerate until the chocolate is set.
-
Once set, serve, enjoy, and watch them disappear almost as fast as you made them!
Tips for Serving
Ready to serve your Butterfinger Bliss Balls? They are amazing as they are, but you can enhance the presentation by drizzling extra melted chocolate on top or sprinkling crushed Butterfinger bits for a decorative touch. Serve them in a fun bowl or platter for a delicious centerpiece at gatherings. Pair with a glass of cold milk or a scoop of vanilla ice cream for an unforgettable treat experience.
Make-Ahead and Storage Guide
Keeping your Butterfinger Bliss Balls fresh is a breeze! Store any leftovers in an airtight container in the refrigerator for up to a week. If you want to keep them longer, they can be frozen for up to three months. Just make sure to separate them in layers with parchment paper to avoid sticking. Always ensure good hygiene practices while handling food to ensure safety.
Pro Chef Tips
- Chill your ingredients: For easier mixing, try chilling your peanut butter before combining it with the other ingredients. It can help create a firmer texture.
- Use parchment paper: It makes for easy cleanup and prevents your bliss balls from sticking to the baking sheet.
- Experiment with chocolate: Don’t hesitate to mix up your chocolate coatings. A combination of milk and dark chocolate can offer a delightful balance of flavors.
Creative Twists
Feel like switching things up? Here are a few variations you could try with your Butterfinger Bliss Balls:
- Add-ins: Toss in a handful of mini marshmallows or chopped nuts for extra crunch.
- Flavor swaps: Try using almond butter instead of peanut butter for a nuttier taste.
- Coconut coating: After dipping in chocolate, roll the balls in shredded coconut for a tropical twist!
Your Questions Answered
What is the prep time for Butterfinger Bliss Balls?
The total prep time is about 15 minutes, plus an additional 30 minutes for freezing.
Can I make these ahead of time?
Absolutely! They store well in the fridge for a week and can be frozen for up to three months.
What can I use instead of graham crackers?
If you’re looking for a gluten-free option, crushed gluten-free cookies or rice cereal can work as a substitute.
With these Butterfinger Bliss Balls, you’ll have a simple and delightful treat that will impress your friends and family. Once you taste these sweet bites, you’ll definitely be going back for more! Enjoy your baking!
Print
Butterfinger Bliss Balls
- Total Time: 45 minutes
- Yield: 20 servings 1x
- Diet: Vegetarian
Description
Indulgent no-bake treats combining creamy peanut butter, crunchy Butterfinger bars, and smooth chocolate coating.
Ingredients
Scale
- 1 cup creamy peanut butter
- 1 cup crushed graham crackers
- 1 cup Butterfinger candy bars, crushed
- 1 cup melted chocolate
Instructions
- In a mixing bowl, thoroughly combine the creamy peanut butter, crushed graham crackers, and the crushed Butterfinger candy bars until everything is mixed evenly.
- Use your hands to shape the mixture into small balls, about 1 inch in diameter.
- Place the balls on a parchment-lined baking sheet.
- Freeze the balls for around 30 minutes to firm them up.
- Melt your chocolate in a microwave-safe bowl or using a double-boiler.
- Dip each frozen ball in the melted chocolate, making sure it’s fully coated.
- Return the chocolate-covered balls to the parchment-lined baking sheet and refrigerate until the chocolate is set.
- Once set, serve and enjoy!
Notes
Drizzle extra melted chocolate or sprinkle crushed Butterfinger bits on top for a decorative touch. Store leftovers in an airtight container for up to 1 week.
- Prep Time: 15 minutes
- Cook Time: 0 minutes
- Category: Snack
- Method: No-Bake
- Cuisine: American
Nutrition
- Serving Size: 1 bliss ball
- Calories: 150
- Sugar: 10g
- Sodium: 100mg
- Fat: 8g
- Saturated Fat: 3g
- Unsaturated Fat: 4g
- Trans Fat: 0g
- Carbohydrates: 18g
- Fiber: 1g
- Protein: 3g
- Cholesterol: 0mg
Keywords: Butterfinger, no-bake, snacks, desserts, easy recipes